
Better than Salt Dough Ornaments
In years past we have made salt dough ornaments, but this year we decided to switch it up and try a new recipe that is even more eco-friendly. It’s not that salt dough ornaments are totally unsustainable. It’s just that they require a few hours in the oven to harden (energy = fossil fuels). This new recipe air drys but it does require a little bit of stovetop time. However, 7-10 minutes on the stove is a lot less energy used than 3 hours in the oven. Additionally, this recipe does not require plastic wrap or any single-use items. Yippee!
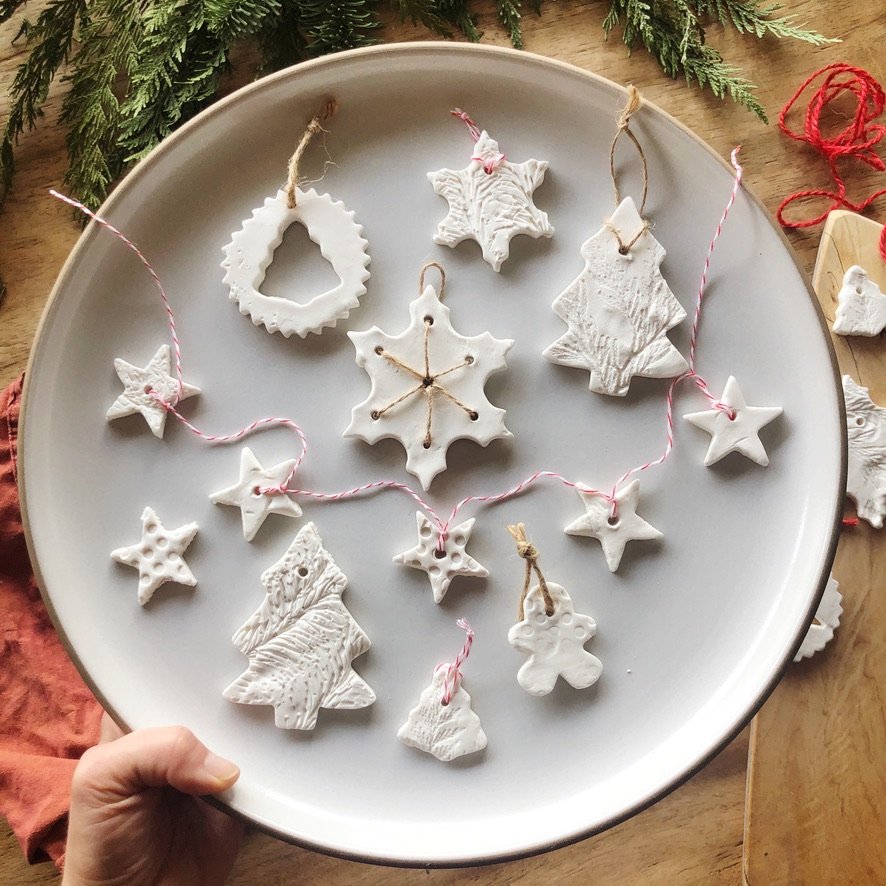
In years past, we have also found that salt dough is difficult to get smooth because of the salt crystals and it makes your hands all itchy and dry from the salt. Salt dough ornaments also tend to look like sugar cookies hanging on the tree rather. The dough in this recipe, on the other hand, is beautiful and is fun to play with adding unique textures on it as well. We found so many uses for our homemade cutouts. We used them as ornaments, strung on a garland, and as a cute gift tag for presents under the tree.
This Better Than Salt Dough Ornaments recipe is a great activity with kids, and makes for a wonderful holiday tradition.
DIY Recipe: Better than Salt Dough Ornaments
Time: 10 minutes prep | 1-hour cooling dough | 30 minutes cutting shapes | 24-72 hours air drying
Servings: Makes enough dough for two children to make ornaments

Ingredients:
2 1/2 cups baking soda
1 1/4 cups cornstarch (plus extra for rolling)
1 1/2 cups + 4 teaspoons cold water
Instructions:
Add baking soda, cornstarch, and cold water together in a pot or saucepan. Stir until combined.
Over medium heat, stir the mixture consistently for 5-7 minutes. Once it starts to thicken and come together (similar in texture to thick, smooth mashed potatoes), stir consistently for another 2-3 minutes. If you use too much water or do not cook long enough, your final ornaments are more likely to crack.
Transfer the dough to a glass bowl (we used a Pyrex) and cover with a damp cloth for a minimum of 1 hour / until room temp.
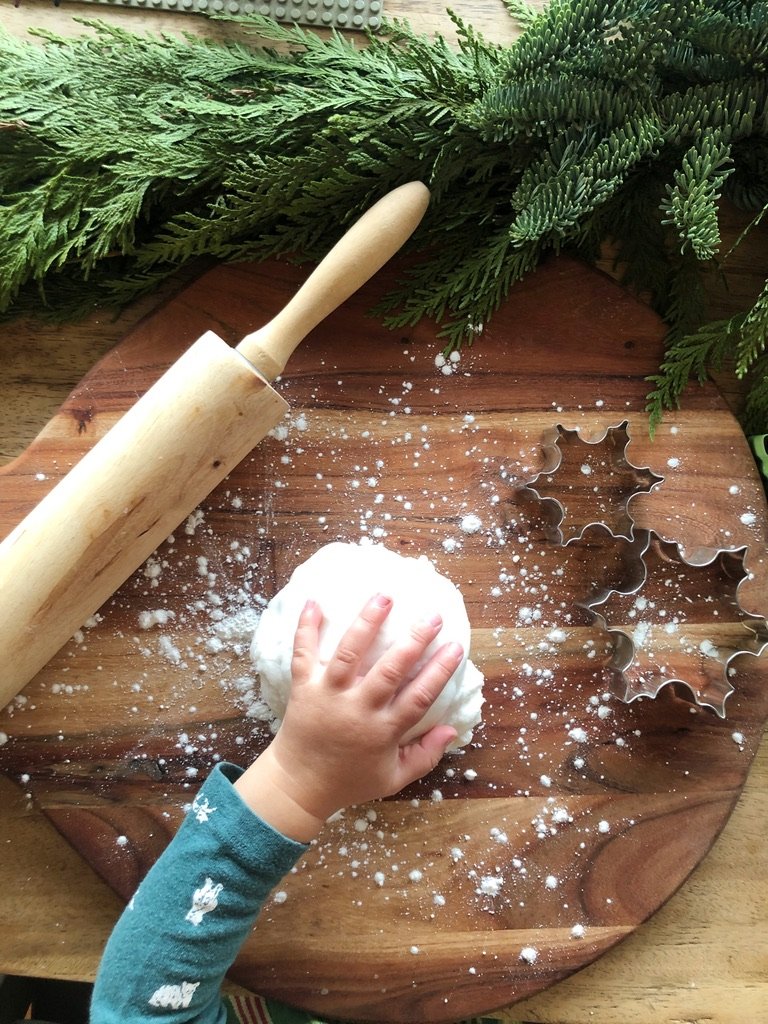
Knead the cooled dough to form a ball. Sprinkle the surface lightly with cornstarch if you notice the dough is sticking. Roll the ball out into a sheet (thickness depends upon preference — however, too thin is not recommended as the ornaments will be brittle).
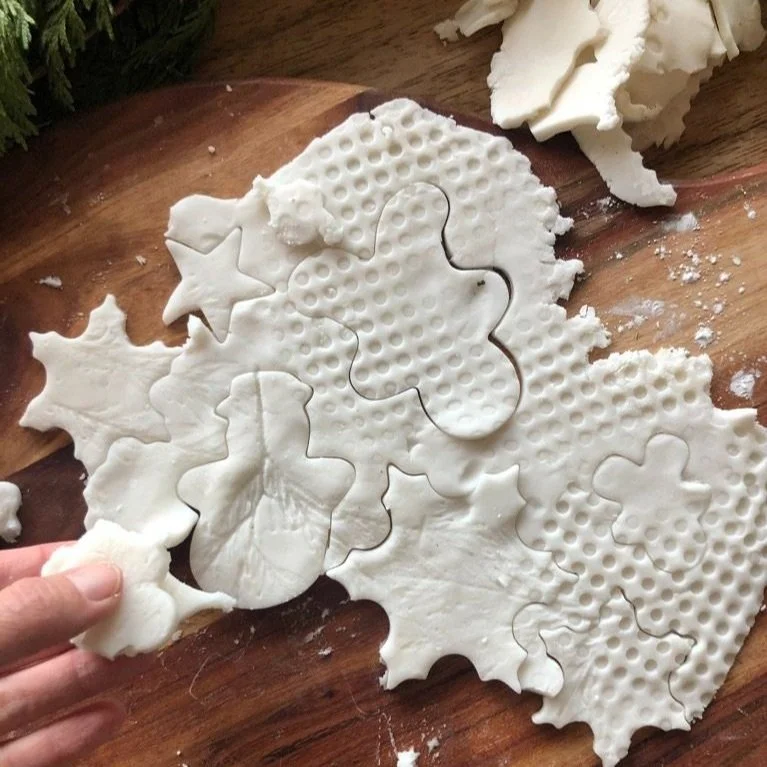
Stamp dough with different textures, if desired. Look through the recycling, garden/Christmas tree clippings, and kitchen tools for interesting options.
Using cookie cutters, cut out shapes. Use a chopstick to create holes for hanging.
Leaving the cut ornaments on the counter or tray, peel back excess dough leaving the ornaments behind. Using a spatula, remove ornaments and place them on a plate or cookie sheet to air dry overnight (24-72 hours) and out of direct sunlight to prevent cracking. If left on a cutting board, it may discolor it slightly while drying over a few days.
Any excess dough can be rerolled into a ball and used again until everything has been used up (yay, zero waste!).
Once dry, use compostable twine or a repurposed ribbon to loop through the hole and make it into an ornament or gift-wrapping accessory. Skip brand-new ribbon (ribbon isn’t compostable or recyclable and is destined for the landfill).

Note:
If your home is slightly damp and your ornaments do not seem dry after 72 hours, you can put them on the baking sheet (with a silicone mat, if desired) in the oven for 30 minutes at 175F to harden them up a bit. However, it’s best to wait 1-3 days before popping them in the oven. We made ours on a rainy day. In our damp house, they seemed fully dry and ready to string after 4 days.
